DCP-o-matic main advantages are:
- It is free
- Includes a quick audio normalizer
- Includes a quick LCR upmixer
- Has automatic scaling to fit flat and scope containers
- A picture is automatically made into a 10-sec video
- Testing in DCP-o-matic player with soft subtitle support
I have also written tutorials on how to make DCPs in
Davinci Resolve Studio and
Fraunhofer Easydcp Creator Plus
How to make a DCP in DCP-o-matic from a video file
Sometimes cinemas get sent marketing files that they want to play as DCPs:
- A picture, usually a movie poster
- A PSA with an intro from the filmmaker
- A commercial
These files are often jpeg/TIFF, mp4, or MOV video files in 1920×1080 format. A quick way to convert these kinds of files to the DCP format and test them is the free software DCP-o-matic/DCP-o-matic player.
Example: A 1920×1080 PSA video file in h264/stereo that will play with the Flat commercials.
Download and install DCP-o-matic
Download from the DCP-o-matic website
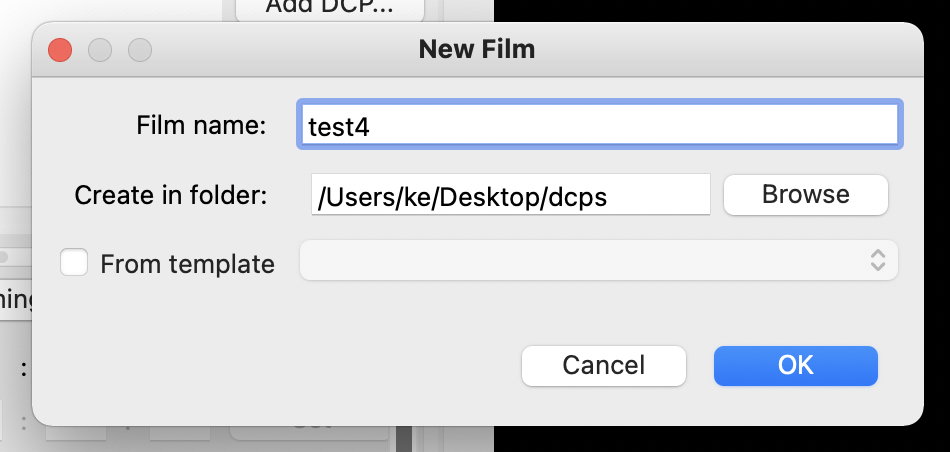
Choose new film and import the file
Choose File – New Film
Choose a name and folder
Open the video file
Click on Add file(s) or drag the video file to windows
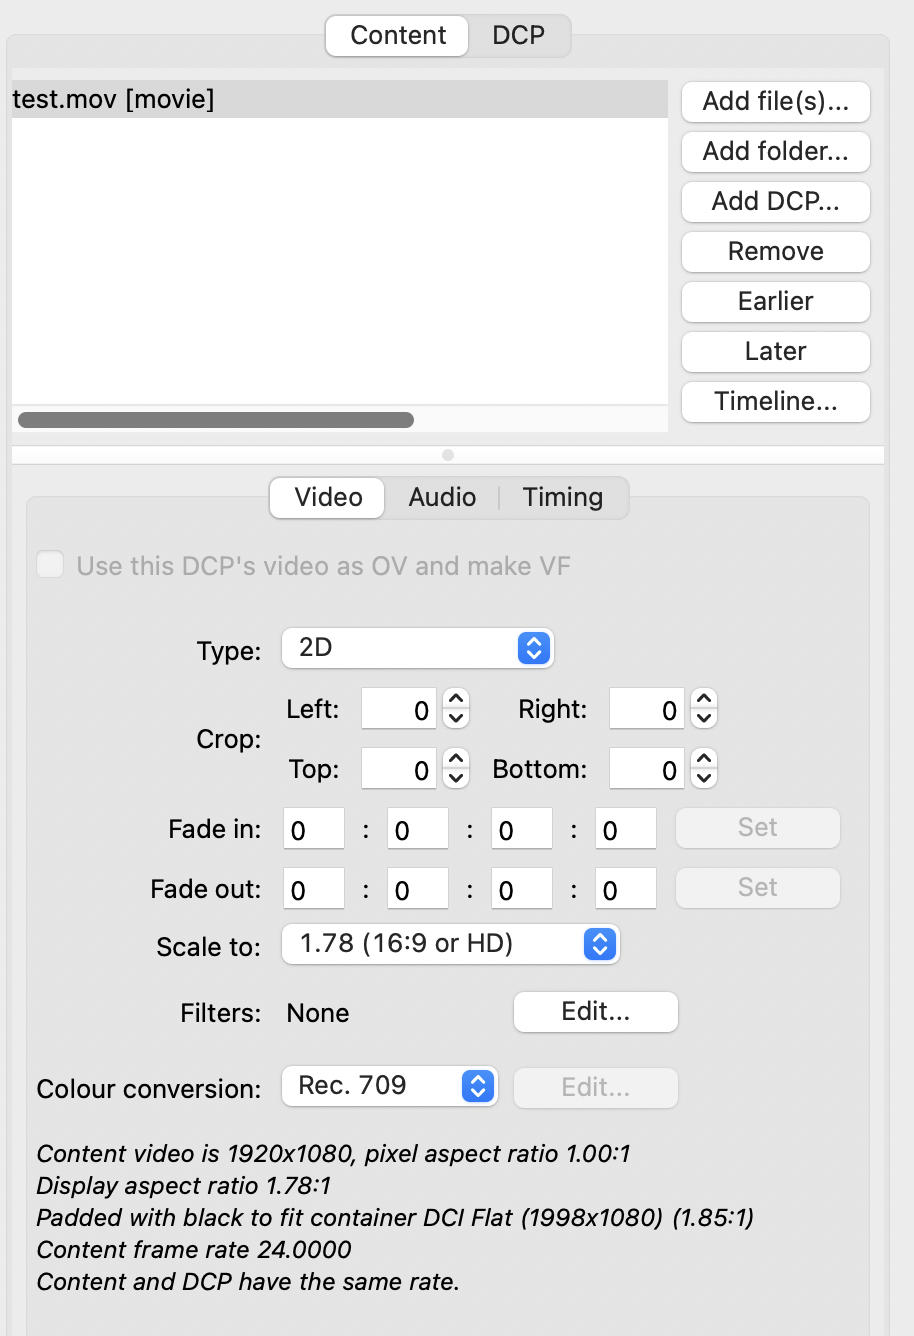
Choose source file settings
Scale to:
I leave it at the automatically chosen setting 1.78 (16:9 or HD)
Filters
The video file is a normal HD progressive video file so I leave it at None. If it was an old interlaced clip, I would choose a deinterlacing filter like YADIF.
Colour Conversion
I leave at the default Rec.709 2.2 gamma setting. If the clip was 2.4 gamma, I would change the setting.
Choose DCP settings
Click on DCP

Flat or Scope container
Check that Container is set to DCI Flat in Video.
If I wanted to play the PSA with a Scope trailer or feature I would choose DCI Scope as the container. The ISDCF name will automatically change to F or S when I change the container.
Content type
Choose Content Type:
Advertisement, Trailer, Feature, Short or Public Service Announcement (PSA). The ISDCF name will automatically change to PSA.
Interop or SMPTE
Choose Standard. Either Interop or SMPTE. I use SMPTE.
Frame Rate
I use the same frame rate as the source video file: 24 FPS.
The frame rate should be the same as the video file. Most players/servers will play 24, 25, and SMPTE 30 DCPs.
JPEG 2000 Bandwidth
The default setting is 150 Mbit/s. The video file I am converting is a 10 Mbit/s low bit rate h264 video file so I leave it at the default setting. I can choose between 50-250 Mbit. If the source is a Prores video file with a high bit rate of 400 Mbit/s I would choose the max 250 Mbit/s rate. Films made for cinema are usually made with high bit-rate cine cameras
Fill in the additional ISDCF name fields (optional)
If the DCP is only going to be used at your local cinema this step is not so important, but if you are sending it to someone else it is nice to use the full ISDCF name.
Click on details “After use ISDCF name”. Fill in the missing fields.
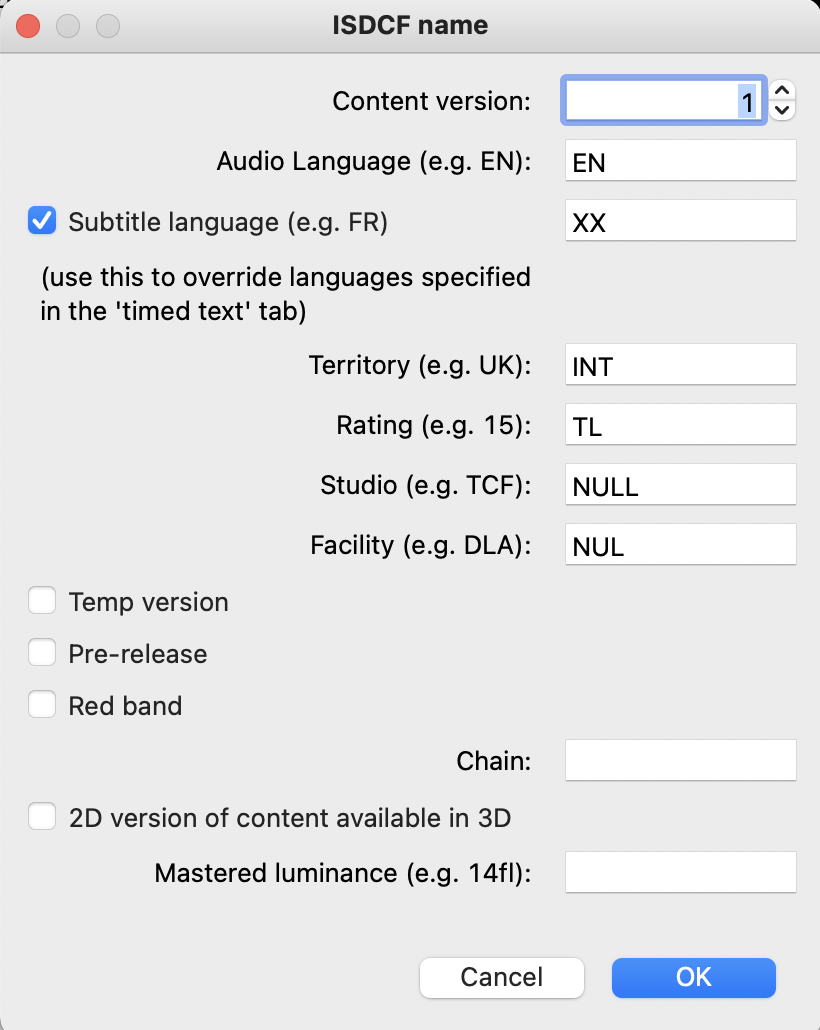
I then click on “Use Copy as name” and change 30 to 51.
Test4_PSA_F-178_EN-XX_INT -TL_51_2K_NULL_20211107_NUL_SMPTE_OV
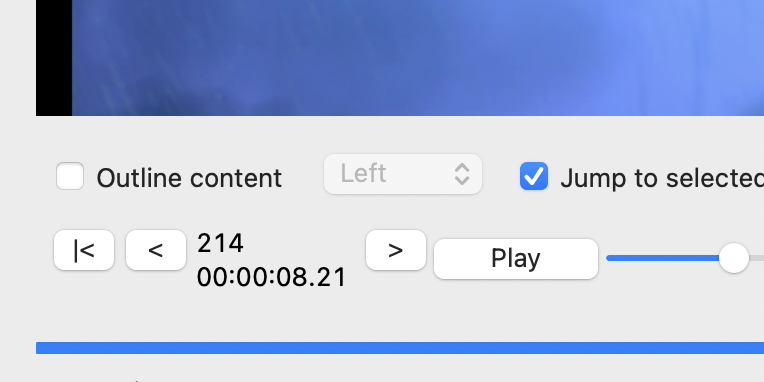
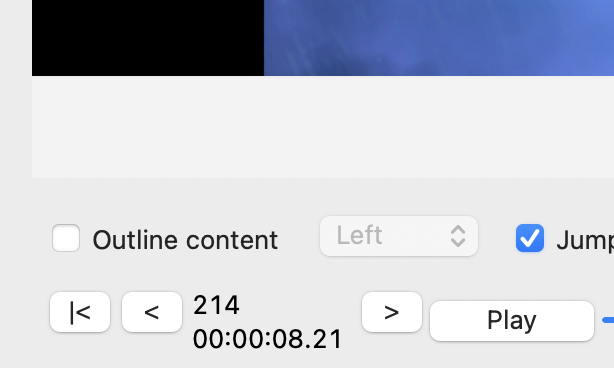
Check if the video looks correct
Go back to content
Scale to: 1.78 (16:9 or HD) looks correct. The video is 1920×1080 and will be shown in 1998×1080 DCI Flat with padding on the sides.
Content and DCP have the same frame rate.
It looks OK
Note:
If I had chosen DCI Scope as the container, DCP-o-Matic would have scaled the video file to 1525×858 to fit inside the 2048×858 Scope container.
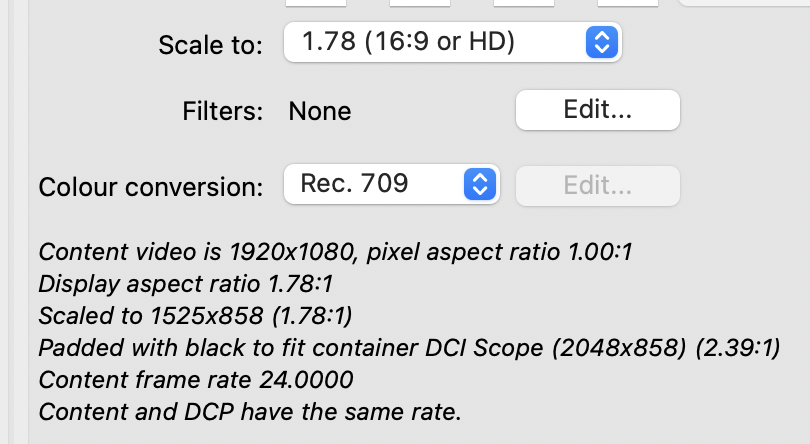
In scope, the HD video will have more black padding on the sides.
Normalize the audio (optional)
Click on Audio
Click on Show Graph of audio levels

Use Gain to Normalize the audio to a level that fits the ad sound level (around -20 integrated loudness).
Note:
Sometimes it is not possible to use gain to normalize the audio to the level you want. If you work in a cinema you could check which fader level to use in the auditorium and then use a custom fader level macro in the playlist.
If you need to deliver 82 Leq (around -20) More advanced tools like Resolve and Izotope Rx can help. A true peak limiter may be needed.
Read more about loudness levels/normalizing audio for DCPs in this post and in my e-book
Convert stereo to LCR (optional)
Click on DCP
Go to Audio
Choose
Channels: 6 – 5.1
Processor Mid-side processor
Show audio
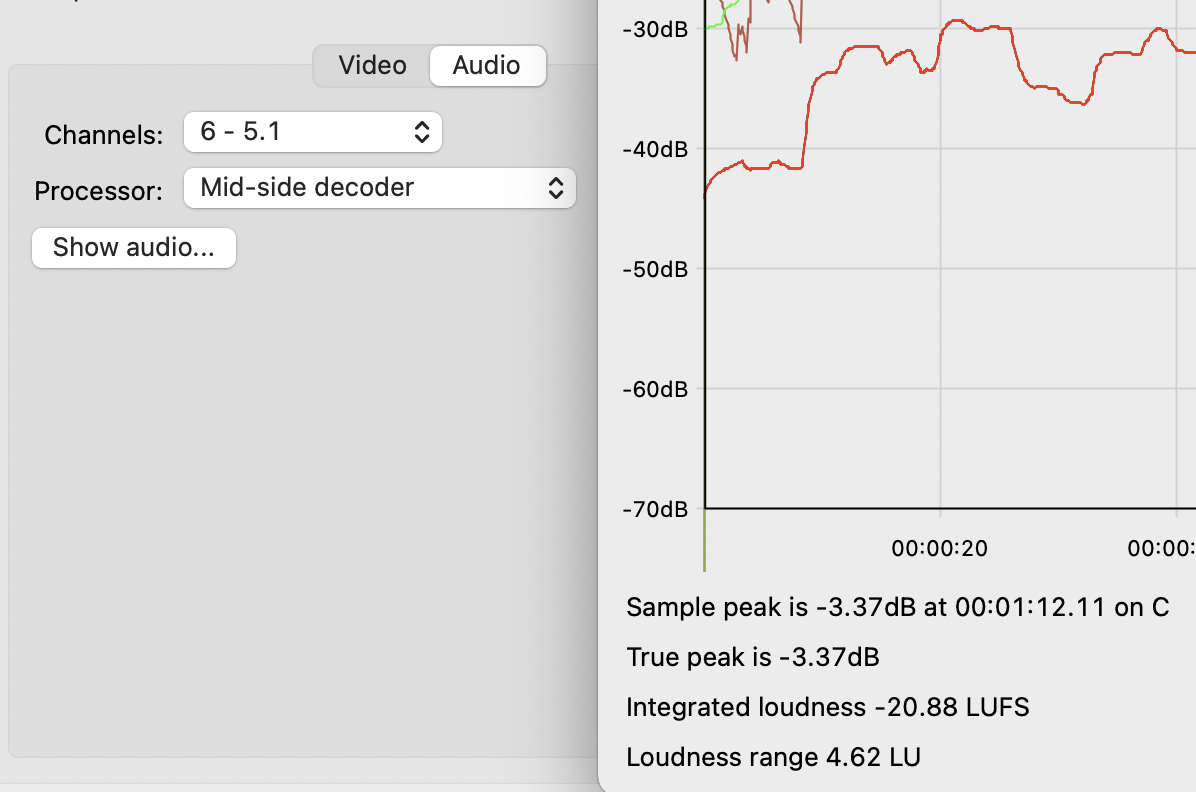
Check the loudness level again. The integrated loudness is now 20.88
Note:
DCP-o-Matic only has a mid-side/LCR upmixer. For a normal 5.1 upmix I recommend using a professional upmix plugin. Read more in this DTS neural upmix in Pro Tools tutorial and this Upmxing in Resolve tutorial
Make the DCP
Jobs – Make DCP
Test the DCP in DCP-o-matic player (optional)
The DCP can be tested in DCP-o-matic player to check sync and to check soft subtitles.
Open the DCP folder with the ISDCF name
Test4_PSA_F-178_EN-XX_INT -TL_51_2K_NULL_20211107_NUL_SMPTE_OV
Decode at lower quality
On slower computers, you need to lower the image quality to have smooth playback.
View – Decode at quarter resolution
Example checklist:
- Is it in the correct Flat or Scope format?
- Are the subtitles too close to the edge of the picture?
- Is the sound in sync?
- Are the subtitles in sync?
Validate
If you want to validate the hash checksums on a downloaded DCP you can use:
Tools – Validate
Deliver the DCP
The folder with the ISDCF name is the DCP and can be ingested on a Cinema player/server/TMS via an Ext3 hard drive.
Most film festivals and cinemas accept a download link with the DCP made with Aspera or Filemail and similar services. Read more about downloading and uploading DCPs.
Dear Knut Erik Evensen:
How to set colour for Tiff squence frames X’Y’Z’ Gamma 2.6 to DCP?
I created DCP using dcp-o-matic, and the original material was TIFF sequence frames with a color space of X’Y’Z’ and Gamma 2.6. However, when I imported the sequence frames into dcp-o-matic, the preview effect of Video was not normal, it was the color sensation of XYZ. But the corresponding colour options do not include the X’Y’Z’ and Gamma 2.6 option, only None, sRGB, Rec.601, Rec.709, P3, Rec.1886, Rec.2020, S-Gamut3/S-log3, Custom. I tried using None, but the resulting DCP color was incorrect, and it still looks like the XYZ grayish green color. How should I handle it and set it?
You should use none since your TIFF sequence is in XYZ already. It will be encoded without a color transform and it will be in XYZ in the viewer, but when the dcp is played in the dcpomatic player, easydcp player, or resolve it will look correct because a xyz to rec709 transform will be applied. Note: When exporting a TIFF sequence from resolve that has a rec709 to xyz 3dlut or color transfrom effect applied you have to export it as RGB sequence, if you export as a XYZ sequence you will get a double XYZ color transform and the DCP will have the wrong colors. This can be the reason it looks wrong.
Dear Knut Erik Evensen:
Thank you very much for your suggestion.I have find the cause of the problem and ultimately obtained the DCP with the correct color .Thank you again!